No edit summary |
(Add diagrams.) |
||
| Line 9: | Line 9: | ||
}} | }} | ||
= Frame construction = | = Frame construction = | ||
[[:File:Dome Instructions BOM.svg]] | |||
== Tubing == | == Tubing == | ||
| Line 14: | Line 15: | ||
* 40 x 'M' : 1.82m x 22mm steel | * 40 x 'M' : 1.82m x 22mm steel | ||
* 50 x 'L' : 1.86m x 22mm steel | * 50 x 'L' : 1.86m x 22mm steel | ||
[[:File:Dome Instructions Pipe Layout.svg]] | |||
=== Construction === | |||
[[:File:Dome Instructions Cover.svg]] | |||
[[:File:Dome Instructions Hub.svg]] | |||
[[:File:Dome Instructions Folding.svg]] | |||
[[:File:Dome Instructions Build 1.svg]] | |||
[[:File:Dome Instructions Build 2.svg]] | |||
[[:File:Dome Instructions Build 3.svg]] | |||
[[:File:Dome Instructions Build 4.svg]] | |||
== Fasteners == | == Fasteners == | ||
| Line 32: | Line 36: | ||
TODO | TODO | ||
= Design decisions = | = Design decisions = | ||
| Line 49: | Line 51: | ||
* 60 herrings are needed | * 60 herrings are needed | ||
* Special tape is used to provide "meat" to mount the grommets on the cover | * Special tape is used to provide "meat" to mount the grommets on the cover | ||
== Cost == | == Cost == | ||
Revision as of 01:32, 9 March 2016
| Maxidome | |
|---|---|
| Participants | |
| Skills | construction, grinding, drilling |
| Status | Production |
| Niche | Mechanics |
| Purpose | Infrastructure |
| Tool | No |
| Location | |
| Cost | |
| Tool category | |
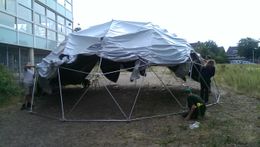
IMG_20150807_205134.jpg {{#if:No | [[Tool Owner::{{{ProjectParticipants}}} | }} {{#if:No | [[Tool Cost::{{{Cost}}} | }}
Frame construction
File:Dome Instructions BOM.svg
Tubing
- 30 x 'S' : 1.57m x 22mm steel
- 40 x 'M' : 1.82m x 22mm steel
- 50 x 'L' : 1.86m x 22mm steel
File:Dome Instructions Pipe Layout.svg
Construction
File:Dome Instructions Cover.svg File:Dome Instructions Hub.svg File:Dome Instructions Folding.svg File:Dome Instructions Build 1.svg File:Dome Instructions Build 2.svg File:Dome Instructions Build 3.svg File:Dome Instructions Build 4.svg
Fasteners
- 7 mm wide zipties
- Grommets
- Tent rope
Cover construction
TODO
Design decisions
- The dome is 4.5m high, 9m in diameter, 63m2 surface area.
- The tubes are 22mm (stainless?) steel tubes
- The inner ring of the hub are a 40mm external diameter steel ring, with a height of 25 mm.
- The outer ring of the hub are a 75mm external diameter steel ring, with a height of 50mm.
- Both ends of a steel pipe are drilled with an 8mm hole, with it's center point located 8mm from the edge.
- The outer hub will be equipped with 24mm holes.
- The short pipes (S) (1.57m) are marked with BLACK tape
- The medium pipes (M) (1.82m) are marked with WHITE tape
- The long pipes (L) (1.86m) are marked with RED tape
- 140 grommets are needed
- 60 herrings are needed
- Special tape is used to provide "meat" to mount the grommets on the cover
Cost
- Pipes 396 euro
- Covering material (Hermetix) 137 euro
- Hubrings: 1 node
- Zipties 20 euro
- 200m Shavelines: 63 euro
- 60 herrings: 12 euro
- Mounting tape for sailrings: 10.5 euro
- 140 Sailrings 21.80
- Sailring mount tool + shipping: 10
Total: 670.30 euro
Useful links
- http://www.cvtotaal.nl/cv-buis-22.html
- http://www.dekzeilenshop.be/nl-content1.asp
- http://www.deboerdrachten.nl/landbouwplastic-landbouwfolie/4682013/Landbouwplastic-Hermetix-50-x-8-meter-wit-groen/
- http://www.touwenwinkel.nl/?p=productsMore&iProduct=1655&sName=aanbieding.-katoen-6-mm-hol-gevlochten--groen--haspel-100-meter.
- http://www.kabelbinders.nl/shop/Tiewraps-kabelbinders-naturel-wit-tie-wraps-colsonbandjes-bundelbanden/
