SpaceModular: Difference between revisions
No edit summary |
No edit summary |
||
| Line 1: | Line 1: | ||
{{ | {{Inventory | ||
|Name=SpaceModular | |Name=SpaceModular | ||
| | |Owner=Space | ||
|Status=In need of modules | |Status=In need of modules | ||
|Picture=SpaceModularEmpty.jpg | |Picture=SpaceModularEmpty.jpg | ||
|Tool= | |Tool=Yes | ||
|Category=Music production | |||
|Location=Studio | |Location=Studio | ||
}} | }} | ||
Revision as of 16:43, 8 June 2020
| SpaceModular | |
|---|---|
| Owner | Space |
| Status | In need of modules |
| Location | Studio |
| Tool | Yes |
| Tool category | Music production |
SpaceModularEmpty.jpg {{{InventoryOwner}}}Property "Tool Owner" (as page type) with input value "{{{InventoryOwner}}}" contains invalid characters or is incomplete and therefore can cause unexpected results during a query or annotation process. Studio
What
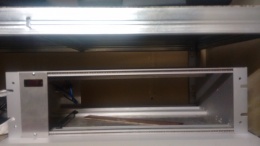
Eurorack modular synthesizer. We have a 3U 19" case in which we want to experiment and play with eurorack synth modules.
Powah
For now we will start with a USBPowerThingy. This is a USB powered busboard with 6 connectors (3x 10 pins and 3x 16 pins). When we run out of space or juice, we can look for another solution. The board is mounted, but the location and manner is not ideal, but for now it'll do.
Modules
None yet :<
Supplies
There's a little box with screws and washers and it will contain more ribbon cables in the future
Todo
- Design and print a mount for the USBPowerThingy
- Wait for ordered ribbon cables (3 times 10 pins on both sides) and put them in the USBPowerThingy
- Better solution for power, possibly using the 230V connector on the back and switch on the front (USB brick inside the rack?)
- Maybe a better USB brick, the one we use now is 1A
- Maybe put a top cover on the rack

